Browsing Category

All posts

All posts

Knitting Rainbows

April 28, 2015

Most of my time at the moment is being devoted to my little hexie patchwork quilt, but I always have some knitting and crochet on the go to provide a little variety, and I've just finished this lace and beaded shawl:

I picked up this gorgeous merino and silk blended yarn from Skein Queen a little while ago.  The yarn is 'Lustrous' and the colour is 'Pearly Rose', which Debbie at Skein Queen describes as: "rose, lilac, golden brown with touches of spring green, pale blue and coral on cream. Randomly dyed".  So pretty:

Of course I had to pick up some rainbow coloured beads to go with it and I love how these work with the yarn, taking on the reflections of the colours closest to them in the knitted fabric:

Knitting rainbows – what could be better? 🙂

All posts

en vacances

April 20, 2015

Last week, him indoors had a week off work and although I can't have a week off work due to my boss (me) being proper stingy that way, we did manage several days out and about.  The fanciest thing about this week was really the title of this blog post – French always makes things seem so much more chic and intriguing, non?

We began the week at our very favourite place to go – the seaside.  We drove up to the Sussex coast and had fish and chips at Aldeburgh after a bracing walk up the beach:

Actually, we walked along the path by the side of the beach because Aldeburgh's beach, being covered with big pebbles, isn't really walking friendly…  Mark wanted to get a picture of a rather intriguing memorial sculpture on the beach this visit.  This is to those lost at sea and is on the stretch of beach between Aldeburgh and Thorpeness:

It was quite cold, although lovely and bright all day and after lunch, we headed off to Sutton Hoo to exercise our National Trust membership cards.

The National Trust appear to have invested a lot of money in the amenities at the site, so I assume that it is very popular but, honestly, we weren't that impressed.  Part of the previous owner's house on the site is open at the moment and we were glad of it – there wasn't an awful lot else for adults to do, although all the school children there seemed to be enjoying themselves.  I do love this huge replica of the Anglo-Saxon helmet found in the excavation on the site that hangs over the entryway to the burial mounds exhibit:

Wednesday's weather was amazing – so warm!  It felt like summer, which made it weird that there were no leaves on the trees.  The National Trust cards were out again, this time at The Blickling Estate – one time Norfolk home and alleged birth place of Anne Boleyn.  The house you see there now was built later in the 17th century on the site of the Tudor house and it is rather lovely, with quite a striking likeness to Hatfield House:

Blickling was last lived in as a family home before World War II and there are a number of pieces on show in the house from that era.  We particularly liked this label on an early Vacuum cleaner that speaks for many of us Brits:

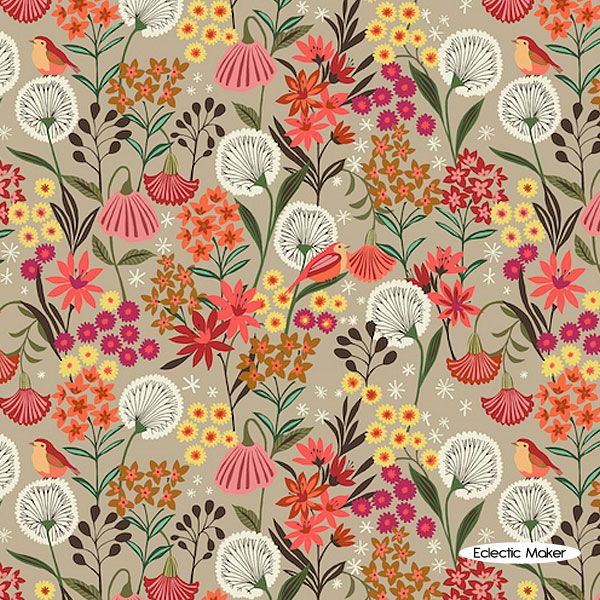
I also found this embroidered bed hanging in one of the bedrooms, which I think would be from an earlier time, but the style of some of the flowers in these panels really reminded me of early 19th century embroidered table cloths:

After looking round the house, we headed out across the estate for what we thought would be quite a short walk.  The walk turned out to be much longer than expected (or desirous) since the walk directions I'd found on the internet proved to be rather badly written and possibly out of date, since the way markers they mentioned weren't in evidence on the ground.  We had a picnic lunch sat on a hill near the Tower in the grounds, which was previously used as the second Earl of Buckinghamshire's horse racing stand and is now available for rent as a National Trust holiday cottage:

The highlight of the day was seeing a little stoat or weasel run across the footpath right in front of us – so cute, so red and so shiny!  Mark didn't have a chance of getting a photograph of him because he was gone in a flash, so we don't know whether he was a stoat or a weasel – apparently, they're not the easiest to identify as they're so similar, even if you see them for longer than a second.

Before heading back home, we decided to go a little further north for another look at the sea – this time at Wells Next The Sea – isn't that a great name?  The beach there looked amazing but it was getting late and several degrees cooler by the time we got there, plus I'd really had enough walking for the day, so we've bookmarked it for a longer visit some other time.  Mark did manage to get me a great shot of one of my favourite black headed gulls.  These birds really are bonkers, but I like them 🙂  Not sure why they're called black headed gulls though – they're heads are definitely brown:

Friday was another nice bright day, although quite a bit cooler.  As we still hadn't managed a proper walk on a beach next to the sea, we decided to head out to the Essex coast and visit Frinton on Sea, a rather strange little seaside place sandwiched between two more commercial seaside spots – Clacton and Walton on the Naze.  There is one fish and chip shop at Frinton (half a mile from the sea) and what seems like thousands of beach huts, but very little else that you'd think of as typically seaside holiday town fare.  You do get the distinct impression that Frintonions would really rather not be welcoming outsiders to their beach.  The beach is quite nice, but when we arrived at around 11am, the tide was pretty much all the way in and it didn't get that far out by the time we left, a little after 2pm.  We had a long walk along the promenade (aka concrete sea wall) to Walton on the Naze and saw rather more of those beach huts than we could shake a stick at and, on the way back, we did finally manage a bit of a walk on the beach:

Such a nice little interlude and now we must retour au travail – at least until the weekend 🙂

As usual, all photographs by him indoors.

All posts

Quilting Time

April 11, 2015

Last weekend I had an urge out of nowhere to make a quilt.  Let's be clear – I have absolutely no business making a new quilt – I have several on the go, all at different stages.  I'm in the process of quilting one – my Indian Summer Stars quilt:

Then there is my Window on the Forest MKII quilt, which is waiting to be sandwiched and basted so I can quilt it (apologies for the poor quality picture):

And then there is last summer's scrap busting endeavour – ' Rabbit Patch' – an applique piece which still needs borders adding, sandwiching and quilting:

Plus, I've got all the fabrics to hand to make another of last year's ideas – a template piece with yachts and beach huts using Liberty lawn, which didn't even get off the ground yet!

To be fair, I haven't had enough time since last Summer to do any quilting, apart from bits here and there in sewing cases, nightdress cases, quilted stockings and a little wall hanging:

This has really kept my hand in as far as hand quilting is concerned without making the large time commitment that a quilt demands.  But now, inspiration has struck and must be answered! 

I'd had my eye on a pretty fabric collection for months – Suffolk Garden by Brie Harrison for Dashwood Studios:

I really wanted to do something with this collection and a quilt is always a great way to use a pretty collection like this.  Plus, a quick look in the online fabric shops showed me that it was selling out in some places, and others only had one or two of the prints available.  Luckily, Fabric HQ had all the prints and I love how quickly they dispatch fabrics – they completely understand the needs of the inspiration struck stitcher!

As there is a garden theme to the fabrics, I decided that a Grandma's Flower Garden hexie design was the way to go and was instantly excited about it – it's been 2 years since I made my last English Paper Piece quilt and my hands have just about forgotten how rough it was on them:

I immediately got on with finalising my design and ordering the fabrics and, while I waited, I got to work cutting out 247 one and a quarter inch hexies from scrap paper, using a plastic template and a pair of scissors.  I know that one of those fabulous template cutting machines would make this all so much easier and quicker for the paper and the fabric, but I just don't do enough of this kind of making at the moment to justify the investment in one.

The fabrics arrived on Wednesday and I've already cut out all my hexies and have almost finished tacking them to the papers – only about 60 left to do, which I should polish off over the weekend.  I'm quite surprised how quick this part has been to be honest – I thought it took a lot longer last time…

I've decided to save my very favourite print from the collection for the backing and binding of the quilt, which is going to be cot sized to keep it manageable:

So excited to start piecing and see it grow – especially since I've learned an awful lot about the processes involved since my last quilt and hope that this one will be all I would want it to be!  And, hopefully, finishing this little indulgence quilt will spur me on to complete my other unfinished ones 🙂


All posts

Blocking

March 25, 2015

Well, it seems that I have a bit of a thing for knitting lace all of a sudden. Having both finished and started lace shawls this week, I decided it was time to bite the bullet and buy some proper blocking gear.

When it comes to most of my crochet and knit pieces, all I need to effectively block them is patience, my ironing board, a hot steam iron and a pressing cloth.  This works perfectly for all my favourite yarns and is especially effective for silk based yarns like this silk and baby camel crochet wrap:

It's also great for my favourite mohair and silk yarns, even when the yarn includes sensitive elements like sequins or metallic thread:

But, when it comes to shaped lace shawls, it becomes a little more complicated.

To block my first lace crescent shaped shawl:

I used my ironing board, lots and lots of pins, a hot dry iron and a damp pressing cloth.  The result was perfect, but the process was very time consuming and involved pinning and re-pinning, to ensure that the shape was just right and properly balanced.  Stitcking my longer quilting pins in it at strange angles to get the shawl tauIt didn't seem to do my ironing board an awful lot of good either:

Before making my decision about what equipment to buy, I did my research on line, including watching a number of how to videos.  This one was excellent and I'd highly recommend it for a super clear and simple explanation of what wet blocking involves.

When searching for blocking wires to buy, I came across the KnitPro ones all the time.  Because it's a brand I know already, I decided to go with them.  However, I was absolutely not parting with £25 to buy their blocking board and opted for some simple children's interlocking playmats from Amazon for £4.75 each (I bought 2 packs and found that I needed them):

On Monday morning, I cleared the floor of my studio, gave it a good hoover and set out my kiddie playmats – they're super comfy to kneel on too!  I took my latest completed shawl, a blackcurrant coloured crescent shape made with a yarn called 'Yaksino' (a delicious mix of Merino, Silk and Yak from Skein Queen) and after weaving in the ends, I put it in warm water to soak for 15 minutes with a little Persil wool and silk wash.  Although the video I watched didn't say to rinse out the shawl, I did rinse it – surely it can't be good to leave the wash on it, however little you use?  I got all my equipment to hand, set my latest audio book to play and got started.

The wires themselves are brilliantly bendy and the KnitPro set I bought from Amazon has a number of sizes in it, although it has to be said that £20 is a lot of money for what you get.  I found that I needed to use 4 of the longest wires – two for the top and one for each bottom side.  My one complaint about the wires is that they have flat ends with sharp edges.  Would it have been difficult to make one end softly pointed like a dullish knitting needle or a darning / tapestry needle?  That would have made the process much, much quicker.  As it was, I had to work very slowly threading the wire through the stitches to make sure that I didn't snag the yarn anywhere.  This was easier with this particular yarn, since it is well twisted – but I could imagine how much trickier it would be with a lot of the pure silk yarns I use, or anything loosely twisted.  Having said all that, it wasn't really a lengthy business and the wires were soon in place. I made the mistake of pinning down the top before threading the bottom wires and I won't do that next time as I ended up having to contort myself, in what is quite a small space, to thread the last parts of the bottom edges.  Next time, I'll try threading all the wires first – hopefully without sticking myself in the eye with the end of one of them…

As well as being glad that I bought the second set of playmats, I was also glad that I bought an extra 50 T-Pins to pin out the wires.  This meant that I could use lots of pins without worrying about rationing them on each wire. They went into the playmats like butter and the whole thing worked a treat.

Given that I'm in England and it's March, it certainly took the shawl longer than the couple of hours to dry as mentioned in the YouTube video, but if you live in a warmer climate, it would be pretty quick.  As it was, I left the shawl all day Monday and overnight too, which was way more than it needed.  When I took it up on Tuesday morning, I was very pleased with the final result and am certainly a convert to wet blocking with wires!  I did give it a little press with a dry iron and damp cloth, just to give a final finish to the feel of the shawl and to fine tune a couple of picot points at the edge, but that could just be the perfectionist in me 😀

All posts

Supersized!

March 18, 2015

This week, like last week (and, come to think about it, last weekend too…), has mostly been about knit and crochet, but I had a little escape for a few hours to do a little bit of sewing and I've just completed my latest sewing case, which was a custom order for a fellow sewist via Etsy:

What she wanted was a case based on one of my existing Tilda sewing cases, but supersized with lots of pockets inside. I didn't have enough of the rose print inner fabric to make all the pockets and the inside as well, so we agreed that I'd make the inner with a plain, bright pink Robert Kaufman Essex Linen, and the pockets with the roses print:

This rose print is a swine to pattern match and I found that with so little of it left in my stash, pattern matching was even trickier, plus it also forced a couple of construction compromises. I had to make the little pockets at the front smaller than I would have liked to get the pattern to work with the pocket underneath, and I had to place the scissor keeper at a very slight angle.  Ever noticed how unstraight the patterns on many printed fabrics are?

All the pockets and the scissor keeper are lined with the Essex Linen and I also interlined the back pocket to make sure that any weighty scissors in the keeper wouldn't pull and misshape the pocket fabric.

The larger pockets both have hidden press stud fastenings hand stitched into place, to keep the contents safe:

My supersizing sewist customer wanted coordinating pink felt pages in the centre and I added two sheets in different shades, which I think looks really pretty. I also couldn't resist adding a line of decorative couched herringbone stitches in gold thread to the first page, just for fancy, and because the case's new owner is a cross stitcher – I thought she'd like it:

My customer said she'd been looking for just the right case for ages and hadn't found it – so nice to be able to make it for her and have a little break from my knitting… 🙂