Browsing Category

All posts

All posts

A case of ideas

January 15, 2015

As I’m sure I’ve told you before, I have a lot of ideas – some are good, some aren’t so good, some are flawed, some are dreadful and, now and again, there might be a really good one, and it’s the lure of the occasional really good one that keeps me motivated to work on all of them!

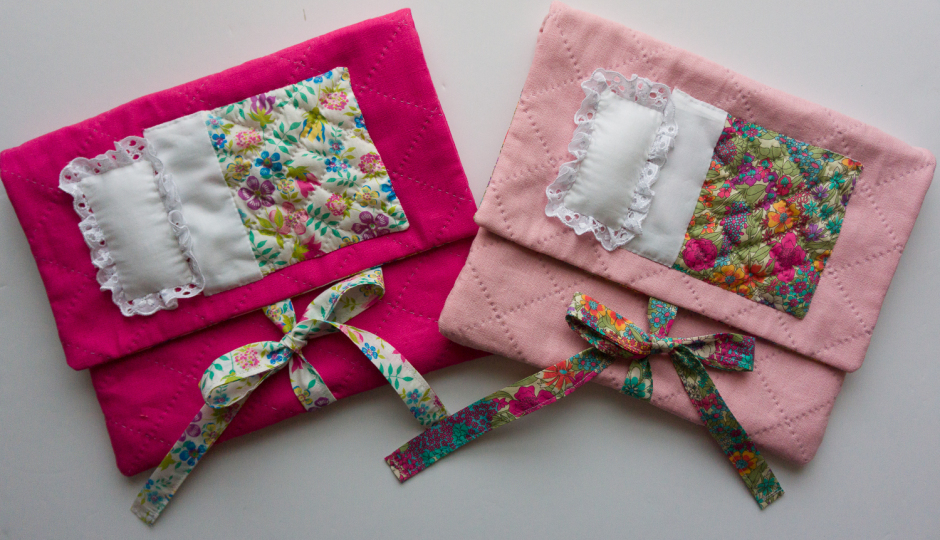
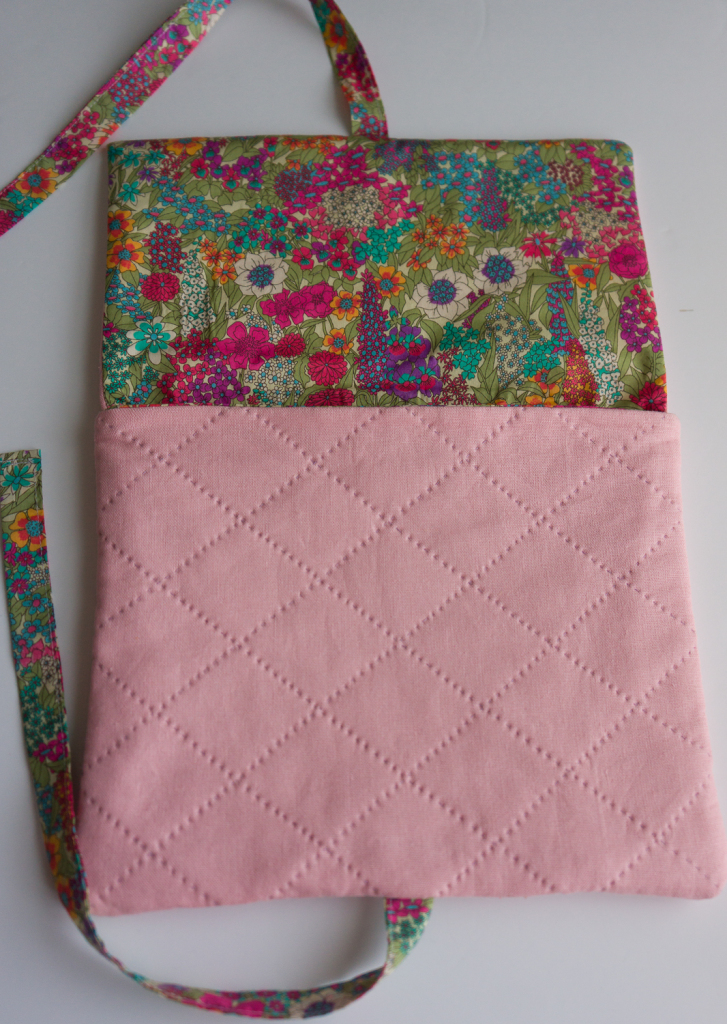
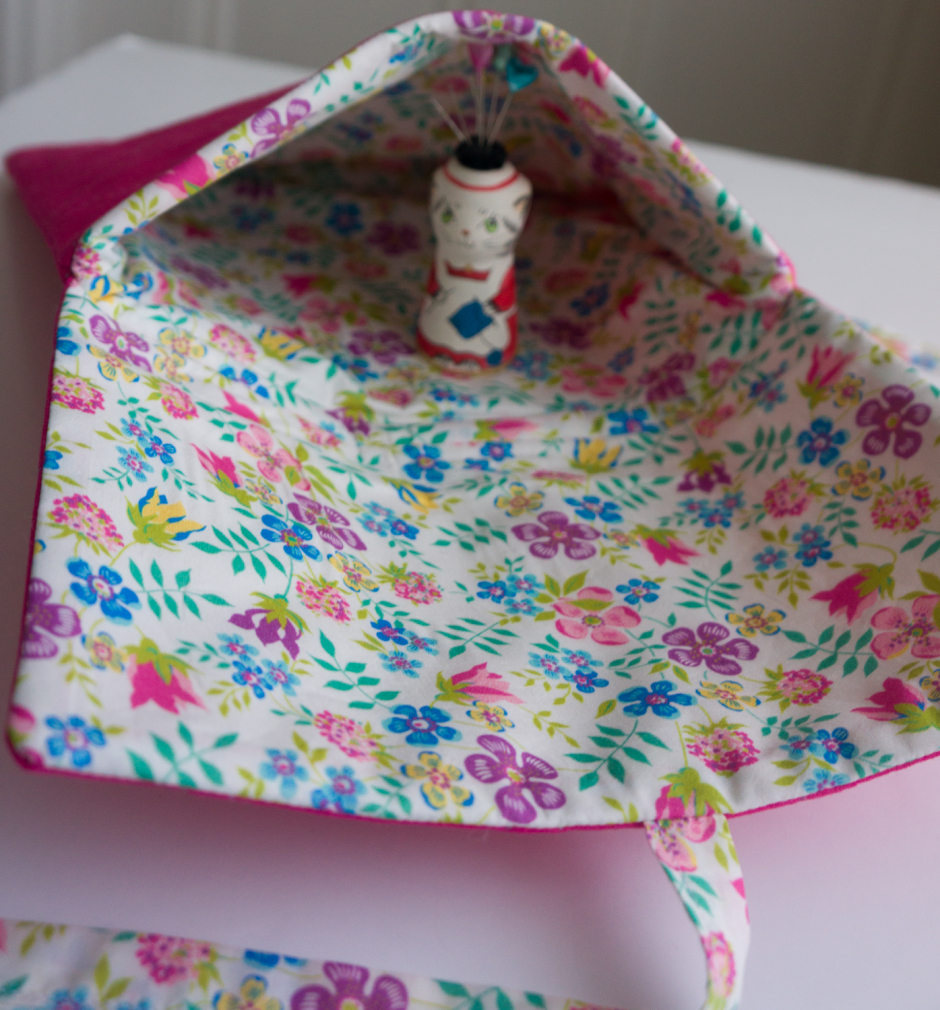
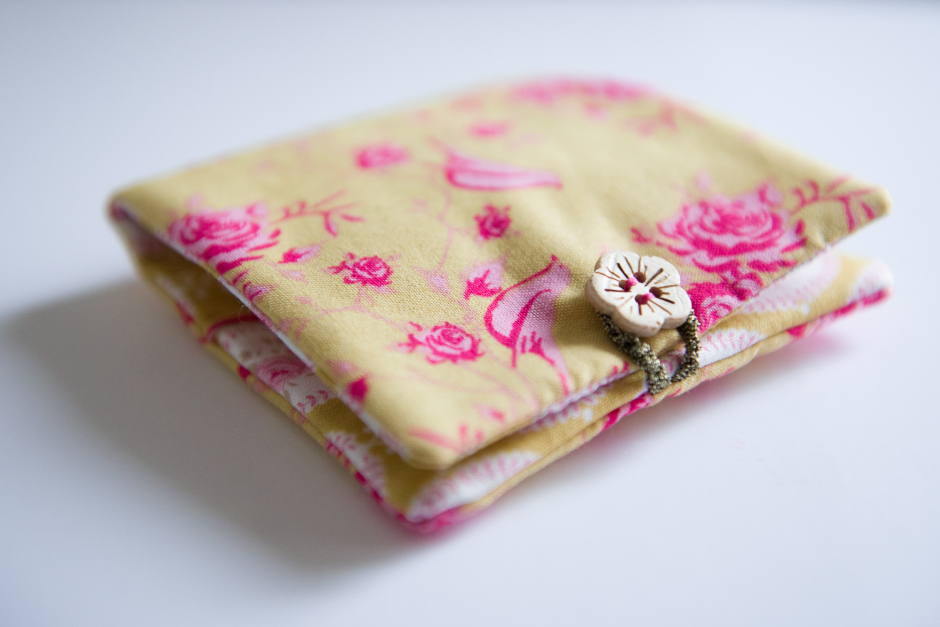
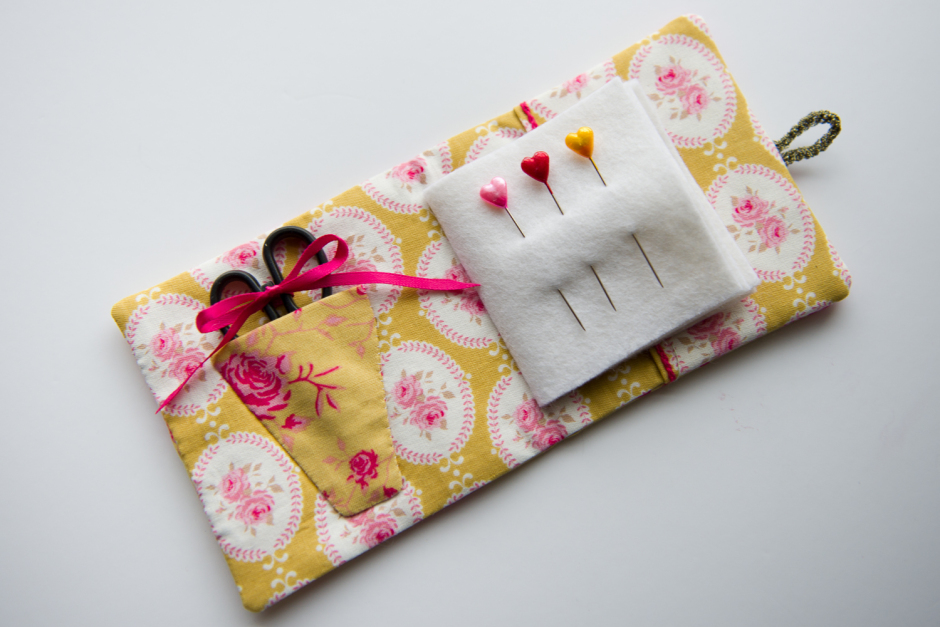
My latest idea began as I was making a sewing case a couple of weeks ago.  I like making sewing cases and make a number of different ones in different styles and fabrics, like this Tilda fabric one:

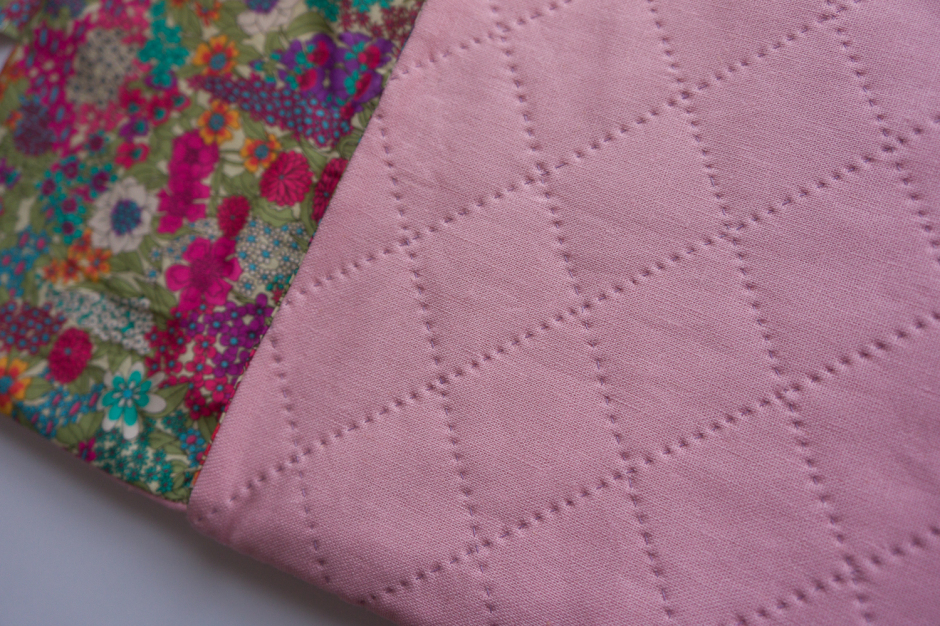
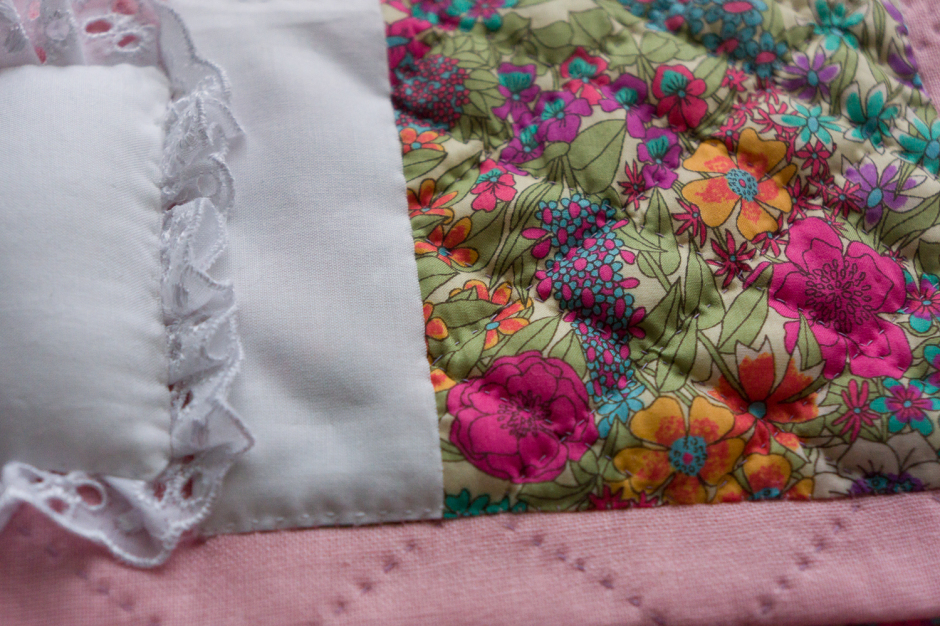
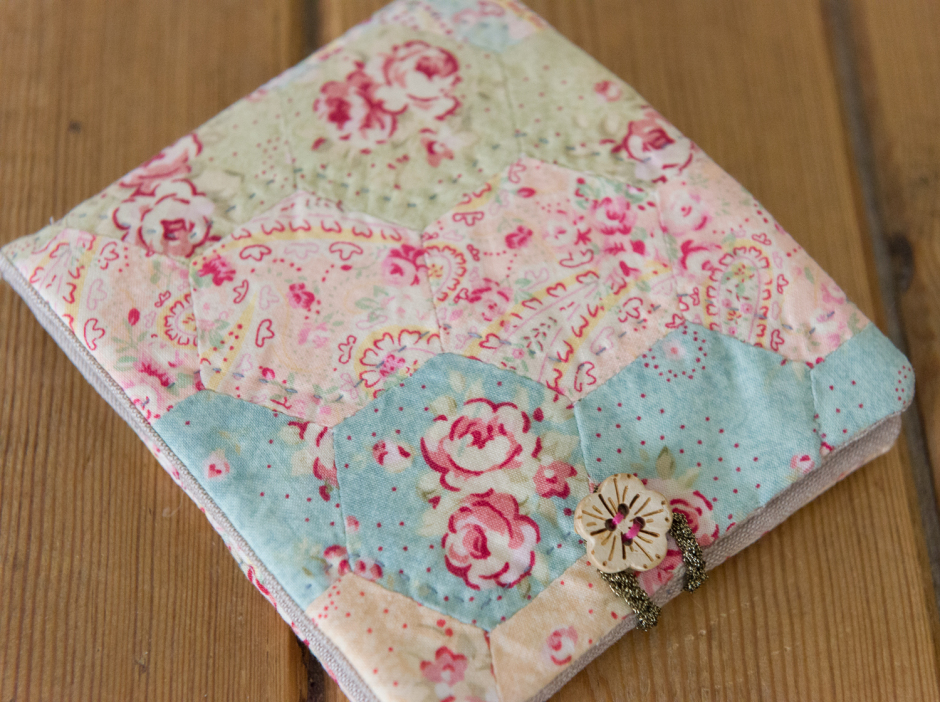
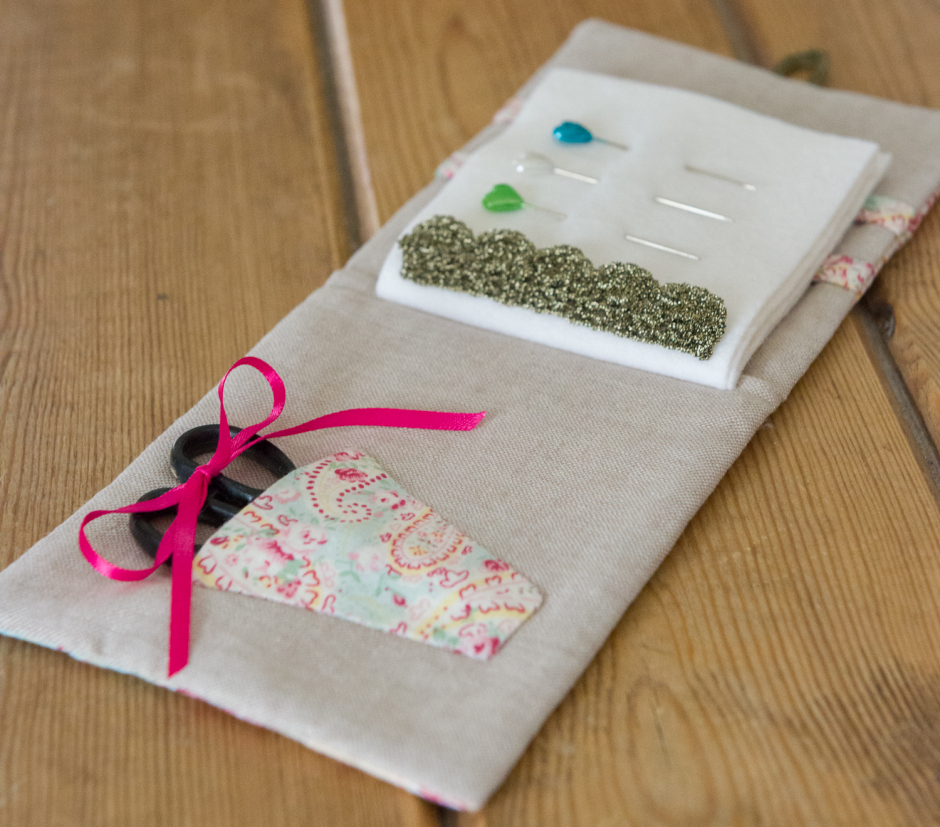
I love bringing in patchwork elements and using linen and embroidery too:

Then there’s English paper piecing, hand quilting:

And adding crochet details:

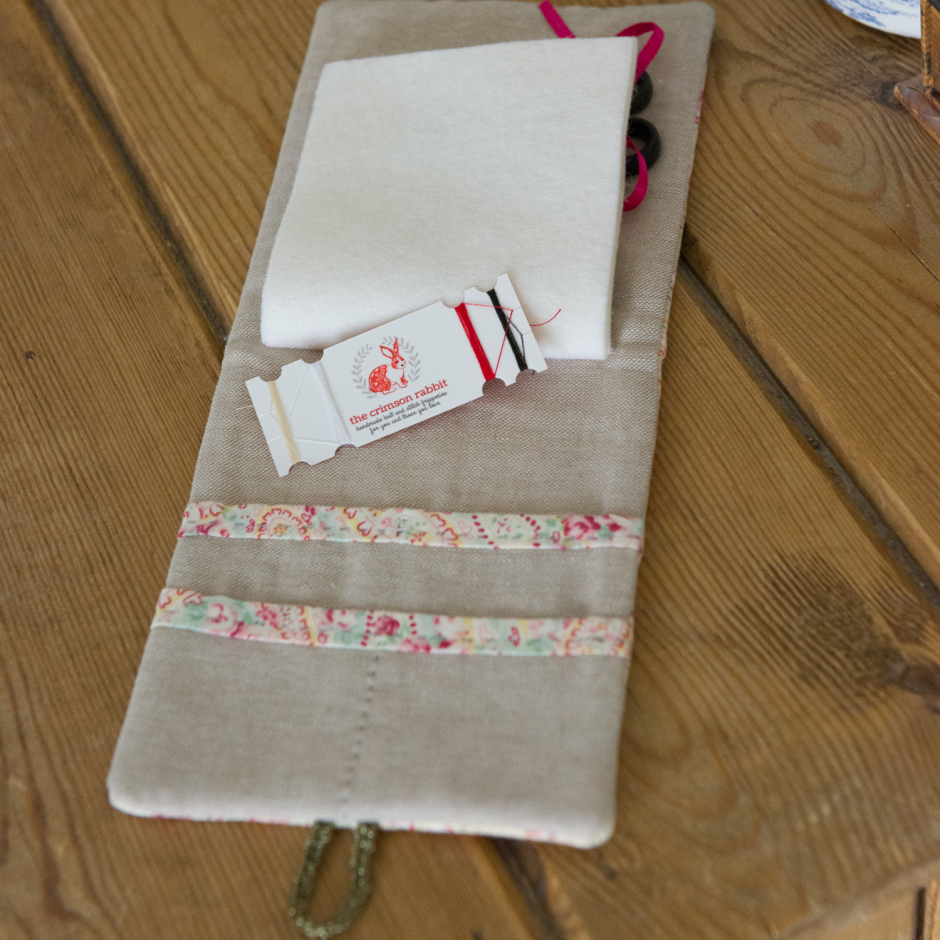
It’s also fun changing up and refining what’s in the case whether it’s changing the pockets, adding fasteners or accessories like this little thread card that I made with one of my MOO mini cards, a hole punch and a pair of really sharp scissors:

So, to get back to my ‘idea’, I was so enjoying making the latest Tilda case that I started thinking about whether I could scale up sewing cases and make something new.  Then, when I put a picture of the Tilda case on my Facebook page and a fellow crocheter asked if I made crochet hook cases I thought, mmm, that might be just the thing!

I’ve looked at knitting needle and sewing cases before and have stopped short of making one because, quite honestly, apart from my set of double pointed needles that live in a roll out of the way simply because I don’t use them so much, I tend to store all my knitting needles and crochet hooks in pots so I can get to them as and when I want them, with minimum bother.  Of course these pots of needles and hooks also get overrun at times with oddments of wool that I can’t bear to discard or put away tidily in my yarn boxes, but they’re still super accessible! 🙂  However, lots of other people obviously do use them, so I thought I’d have a go at designing something.

As usual with me, nothing can be straightforward, and perish the thought that anything I make should fulfil just one requirement – no of course not!  My crochet hook case must also function as a sewing case and have safe storage for other ‘things’ – whatever they might be.  So I brewed the idea for a few days and started to construct the case in my head, made a few sketches and then started refining the look of it, selecting fabric and features, interlining, closures and all that jazz.  Finally, I got all my materials together and started cutting, lining and stitching, starting with the lining of the case, which would give me an opportunity to learn something new and add a lined zipped pocket:

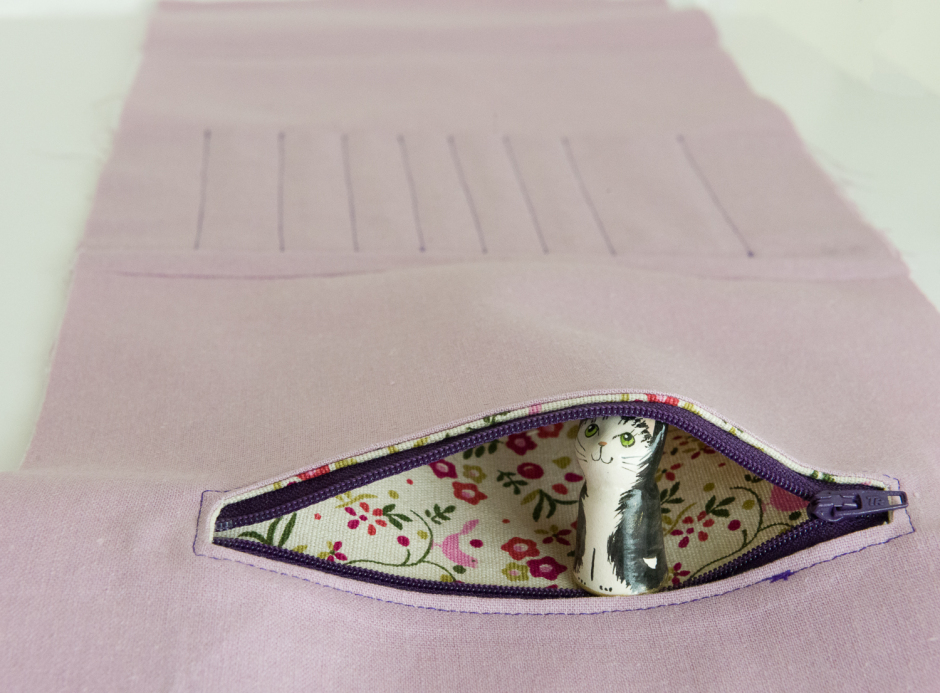
This actually went a lot smoother than I’d expected, as did making the little slip pockets you can see in the background where all the hooks and other ‘tools’ were set to go.  I also thought about how the case would look and operate once it was loaded up with ‘things’ so decided to add a couple of fabric spines to the lining and the outer of about half an inch width, so that the case would fold easily at two points, without becoming all misshapen when full, which some needle and hook cases I’d seen seemed to do.  I selected a medium weight linen and cotton blend fabric for the outer in a pretty print and interlined it with some fusible fleece to add some protective squish.  The lining is also a linen and cotton blend fabric in a toning lilac colour, but in a lighter weight.  I lined this with a medium weight fusible vilene, to add structure.

I then added a little lined scissor keeper and some pure wool felt for pins and needles, which I embroidered into position with simple herringbone stitch in two shades of violet floss.  I then stitched the lining and front together, lining up the two folding ‘spines’, which you can see in the lining in the picture below:

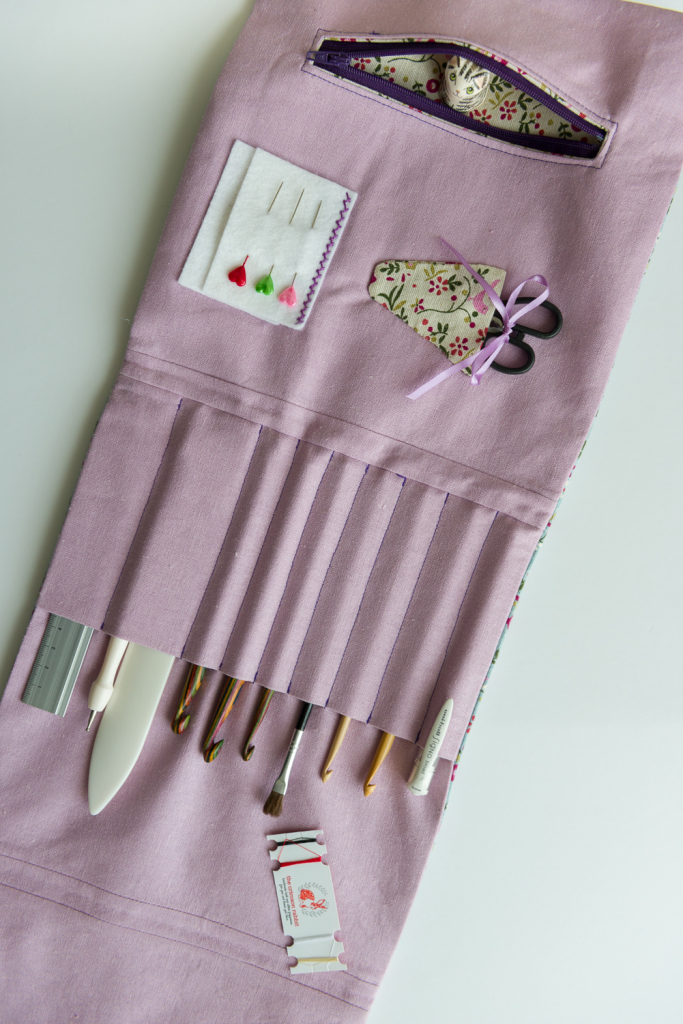
There is a thinner 3rd section to the case that folds over the end where the hooks sit:

I went through a number of closure options and again decided on something new that I thought would look nice but also be flexible enough to work if the case was empty of rammed full of kit – good old elastic!  However, this is elastic that has plush fabric on one side and I also added a little star shaped shell button to it to decorate:

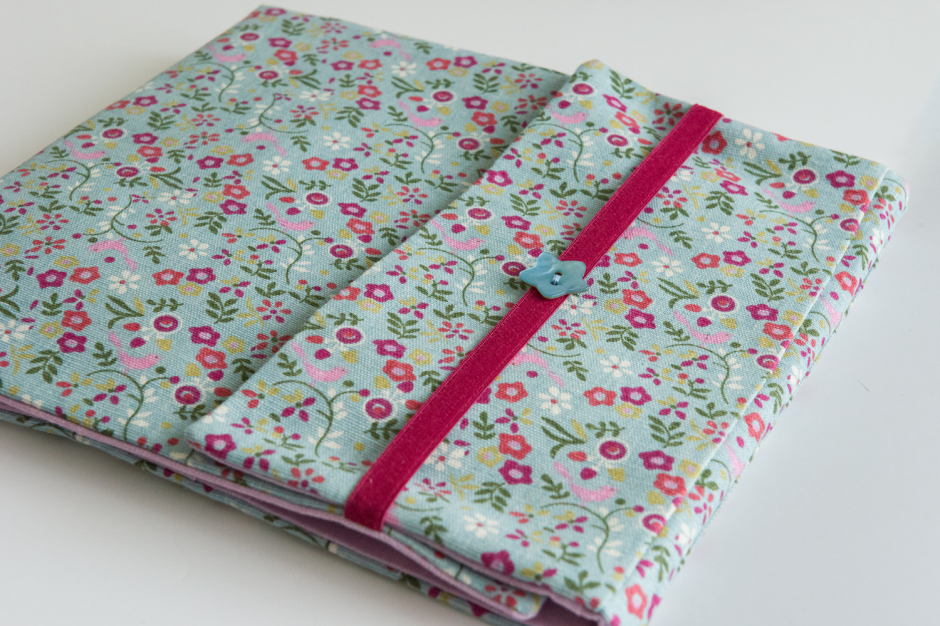
I’m really happy that it looks in reality exactly how it had in my head – always a plus!  I think that, as a design, it isn’t quite right yet – it might be a bit big, maybe trying to do too much, and the closure could maybe work better – I may need to brew it up for a bit longer, but all in all, not one of my worst ideas 🙂

All posts

Christmas Cowling and a Hug

January 2, 2015

I’ve been an obsessive knitter over the Christmas period.  I think this is because I had so many possible cowl design ideas in my head for so long before Christmas, that I just had to get them out and made as soon as I had the time to do it.

So here’s the first one – ‘The Scrunch Stitch Cowl’.  It was going to be a snood, but I liked it better that bit shorter and decided that I’d really only wanted to use the word ‘Snood’ in the title because I was enjoying the alliteration – a major language weakness of mine.  You actually could pull it up over your head, if you wanted to, although I don’t think that is how it looks best:

There’s lots to love about this one, not least that the knit stitch I’ve used is reversible with a pretty lacy looking stitch on the ‘front’ side and vertical lines of raised mounds on the other side – both very different looks – you can see the lace outwards in the picture above and the mounds outward in the one below:

As well as being reversible, you can also wear it either way up for yet more looks.  I used a standard cable style cast on at the start of the bottom of the cowl, which gives a firm edge that is tighter than the rest of the cowl, meaning that when worn with that edge at the bottom, the body of the cowl kind of spills out voluptuously, as in the pictures above.  When I came to cast off though, I used a special cast off technique that creates a really elastic and generous edge, so if you flip the cowl over to wear that edge at the bottom, it stretches out and shows off the deep ribbing cuff I’ve given it:

Lots of options AND it’s made with creamy coloured undyed baby alpaca yarn, which is just SO soft – what more could anyone want? 🙂

Next, I wanted to make something with some Rowan Kidsilk Haze Trio that I bought.  I’d never used this particular Kidsilk yarn before but it was now or never, since Rowan have discontinued it.  At least this meant that I could buy it as a reasonable price – if I’d used it at the usual cost price, I would have had to charge a fortune for the things I made from it.  Not that it isn’t worth the proper price – it is really lovely yarn, so dreamily soft and warm.  The colour  I bought is called Hawthorn and I love the pinky red, grey and cream together, although this is a very unforgiving yarn to work with – like most yarns with a high percentage of mohair, it does NOT like to be tinked or pulled back if you make mistake or change your mind about something.  I had initially thought that I’d make this Kim Hargreaves capey type cowl with it:

I’ve made this piece before for a friend using Kidsilk Aura and whilst it was really nice, it was a bit of a strange shape – neither really a cowl or a cape.  As usual when in doubt, I had a look around ravelry and read the notes of the people who had also made the piece before and most of them seemed to agree with me about the shape.  When I made it before, I made a slightly larger size than my friend needed so that it wouldn’t be so restrictive on her arms, but it was still a bit odd working all those decreases throughout the body.  So, I decided to just use that pattern for the initial inspiration and design my own.  Meet, ‘The Hug’:

The ribbing at the bottom was the first to go – it really is silly to put ribbing on the edge of a piece like this – ribbing is for elastication, which is the last thing you’d really want here, I figured…  I did want some kind of neat looking edging though, so I went for a 1 inch edge of garter stitch, which looks pretty and stops the bottom of the piece curling up.  I also used a long tail cast on so that there wouldn’t be any suggestion of pulling on the bell like shape.  I also decided to knit it in the round rather than making a front and back and seaming together – that seemed rather pointless too!  After I’d done a few sums to work out how many stitches I wanted, where I wanted to put the decreases for the shaping around the shoulders,  and which way I wanted each one to lean and to look, I got knitting.

I have to say that I really enjoyed the mindlessness of this knit after the initial planning,  I knit it continental style because I was working in the round so knit every stitch – so much easier on your wrists.  I like how the shaping looks on the shoulders:

I wasn’t really sure what I wanted to do with the neckline at first – did I want to give it an edging to match the bottom, did I want it long or shorter?  In the end, trying it on the form, I decided I liked it just long enough to curl over and make its own little collar, without the edging.  I cast off with a yarn over at every 4th stitch so that it wouldn’t be too tight and I think it came out just right.  Would look as good over a collared shirt as a polo or crew neck top. although I’m not sure about it worn as a cowl like loop – it kinda works:

The shape when it’s laid flat definitely looks strange, but that weird shape is why it hugs the shoulders so well:

Having done the chunky thing, I was in the mood for something a little more delicate, and what’s more delicate than Rowan Kidsilk Haze?  Although I crochet a lot with this yarn, I don’t often knit with it because it grows quite slowly and, if you are making anything of any size, it can begin to feel quite dull.  If it also quite a fiddly yarn to knit with, even on the best needles, because it is so very fine.  But, the end effect of the yarn knit up is just so lovely that it is worth a reasonable amount of frustration!

I decided to stick with a plain stocking stitch and use an elastic cast on and cast off to create a simple tube that could curl prettily at either end.  Because the stitch was plain, I decided that I’d do some colour work for interest and used 4 shades – 3 in ‘plain’ Kidsilk Haze and the last in the Eclipse version that has a metallic thread woven into it.  This is the end result – I’m calling it ‘The Candy Floss Cowl’, for reasons that are probably quite obvious:

What was a bit strange about this one was that it looked so very dull and straight up and down in my hands while knitting it, but it really comes alive on the form.  The only thing that I wasn’t 100% happy about is that it really is quite impossible to make the ends of the yarn completely invisible when you weave them in – something that I usually manage to do.  There’s really nowhere to hide with such a fine yarn knit at this kind of gauge, although I made sure that all the weaving and security stitching I do with a needle and thread on the ends was done in one line at the back, so nobody sees it when worn.

Love it as a loop:

Or slightly fanned out over the shoulders:

But really love that bit of sparkle from the Eclipse in the silver grey section, and the overall super delicate look of the stitch in those soft colours:

Finally, I wanted to play with the Trio yarn again and make something up that wasn’t in the least bit ‘clever’ – a simple 3×3 rib cowl, which I’m calling (strangely…) ‘The 3 Rib Cowl’.  I think this one finished up as something of a stylist’s dream – you can wear it in so many ways, as long as you have the eye to see them!  Here it is in its straight up form and showing off its stretch:

Then there’s its ‘ruff’ look (the only way this yarn CAN look rough!):

Its floppy look:

Its curly look:

And, finally, its seductive look – check out the fluffiness – mmmm…:

As to knitting the piece, I have to admit that it was pretty dull and reptitive.  Because I was knitting in rib, I had to use the English rather than the continental method (to make sure I got good even tension throughout), so it was pretty hard on my wrists, but worth it for the end result I think.  This yarn really is so soft and incredibly warm – even holding it while knitting made me cosy!

So, now I’ve got these ideas out of my head, I’m back to commission knitting today and am casting on to make the first of two cowls for a lovely client called Sara, who has almost as much of a thing for cowls and scarves as I do 🙂


All posts

The season of the cowl

December 23, 2014

Between crocheting bridal shawls, which I have been doing quite a bit of recently, I’m fully engaged in cowl designing and making.

There have been three cowls completed in the last few weeks – one crochet and two knit.  The crochet cowl is made with a cashmere and silk blend yarn and is the longer style that can be wound as short as you want to make it.  I adore the blues of this hand dyed yarn – the colour is called ‘Bright Skies’, so that’s also become the name of the cowl:

I’ve used the ripple stitch worked flat and then seamed it into a round and worked a simple double crochet edging to both sides, which I think gives it a nice neat finish:

The first of the knit cowls is the one I talked about making in my last post – the Versace cowl.  I’m really pleased with how this one came out – exactly how I’d envisaged it.  I’m not sure that I would want to knit with the metallic thread that I used again.  It was exactly what it should be as far as application is concerned and looks lovely, but my hands are clearly spoilt by the kind of lovely soft yarns I usually use, because they didn’t enjoy working with the unforgiving and slightly scratchy lurex thread!  Having said that, you certainly can’t feel the metallic thread when the cowl is worn, and that’s all that really matters:

It was nice to work with Rowan’s Creative Focus Worsted again, although I was also happy to get back to my favourite Malabrigo Worsted Merino for my next cowl – a mini me version of the Shaded English Rose Tweed:

This one is a bit shorter than the full sized one and certainly not as wide.  Being a little vertically challenged myself, I was curious to see what the design would look like a bit smaller – my bigger cowls drown me somewhat…  In true Goldilocks style, this one is perfect for my 5’2″ frame, so I will definitely be making more of these as an alternative style.  The other great thing about it is that it is so much quicker to knit and uses less yarn so I can offer it for sale at a much more affordable price, which I like.  Isn’t it cute?

I’ve just started another new cowl design this last weekend using a creamy coloured undyed baby alpaca.  I’ve also got another bridal wrap on the go – this time in gold – as well as a little cape I’m thinking of making with some lovely Rowan Kidsilk Haze Trio that I’ve just bought, and then there’s the little mohair striped curling cowl that I’ve got in mind – I won’t go on…  Hopefully I’ll have some pictures of those to post soon 🙂

All posts

Handy work

November 26, 2014

I do love hand quilting.  I also love hand appliqué.  My hands aren’t entirely keen on either though – it is quite hard going on them to use the itty bitty needles involved that sometimes seem as sharp on the eye end as they do on the pointy one!  I’ve also been finding this week that my absolutely essential quilting thimble has been slipping off my finger because it has been so much colder, which isn’t helpful…

My latest nightdress case commission came from a lady who wanted nightdress cases for her grandchildren.  The cases will live at her house and her grandchildren will use them there when they came to stay.  I love that idea – it really is one of those things that you can imagine they will remember from their childhood: “when we stayed with Granny, we kept out pyjamas in these fancy nightdress cases that she had made for us.”  Can’t you just imagine it?

I was asked to make both cases in different shades of pink, so I was keen to partner the pale pink one with a stronger Liberty print (this is Ciara) and the hot pink one with something a little cooler (this is Edenham).  Usually, I use Robert Kaufman’s Essex Linen for the outers, and this is what I used for the hot pink case, but he doesn’t have a paler pink shade so I used his new linen and rayon blend Linen Washer, which is just lovely – so soft and drapey, but still up to the task.  I quilted them both with a lilac quilting thread, so there are elements of sameness and difference in both, which felt right.

I do tend to use this cross hatched quilting pattern in a lot of things, I just like the look of it.  On these cases, I love that you get two different scales of the pattern – one on the case itself and another teeny one on the appliqué beds.

I use a cotton batting for the case itself but a pure wool one for the mini bed because it is so lofty and makes the little bed look and feel like an old fashioned eiderdown, once it’s quilted.

Before hand stitching the bed and pillow into place, I also stitch down the little ‘sheet’ on either side and across the width of the bed.  I like seeing how tiny and tidy I can make the stitches.

The little cases look quite plain before the applique is added, although there is a fair amount of work involved to get to this point since I also interface both the outers and the lining pieces before putting them together:

I do love Liberty tana lawn, but it isn’t the easiest fabric to work with.  Even with a lightweight interface added, it is very delicate and liable to crease where you don’t want it to, but if you use your finest needles and silk pins, it will work with you, and I think it looks gorgeous:

I think I have the design for these little cases where I want it now.  Top stitching around the edges on the outer would give it another lovely level of detailed finish, but I couldn’t use the machine for that – it just wouldn’t look right against the hand quilting stitches on the outer.  It is already a greedy little design with the expensive fabrics and the time taken for all the detailed work, so I think I’ll keep them sans top stitching.  Also, apart from the additional time investment, there’s a limit to how much work my hands can do! 🙂

All posts

Shaded English Rose Tweed

November 21, 2014

My latest cowl design is all finished.  I wasn’t always sure about it, but I am now.  You sunny looking tweedy shady thing 🙂

I even love the edges:

The reverse of the stitch is pretty too:

But the front is prettier – like a little honeycomb of sunshine:

A big cosy hug of a cowl:

Yes, I think it’s fair to say that I’m quite pleased 🙂